> For the complete documentation index, see [llms.txt](https://docs.wrangle.io/llms.txt). Markdown versions of documentation pages are available by appending `.md` to page URLs; this page is available as [Markdown](https://docs.wrangle.io/tickets/ticketing-for-slack-connect/ticket-creation-via-bot-posted-messages.md).
# Ticket Creation via Bot Posted Messages
If you'd like to enable your external customers to create tickets manually using Slack Workflow Builder, you may do so following these steps:\
\
1\. Create a new Slack Workflow using Slack's [Workflow Builder](https://slack.com/help/articles/360035692513-Guide-to-Slack-Workflow-Builder).\
2\. Add a form step (`Collect info in a form`) and add two questions: one for your `Ticket name`, and one for an optional `Ticket description`. Call them anything you prefer, for this example, we'll use "What do you need help with?" and "Describe the issue":
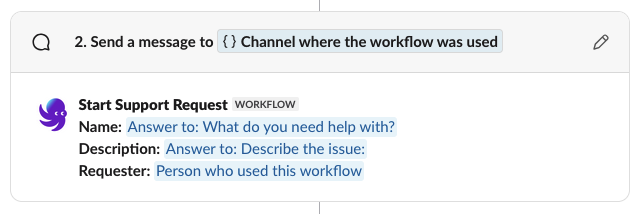
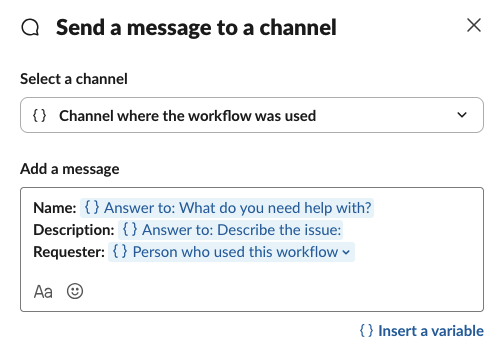
3. Now, add another step to post a Slack message to the `channel where the workflow was used` with **exactly this content**:
You'll need to use Slack Workflow Builder variables to pass your `Ticket name` and `Ticket description` from the previous step.
Ensure you put the "Name", "Description", and "Requester" fields on their own lines.
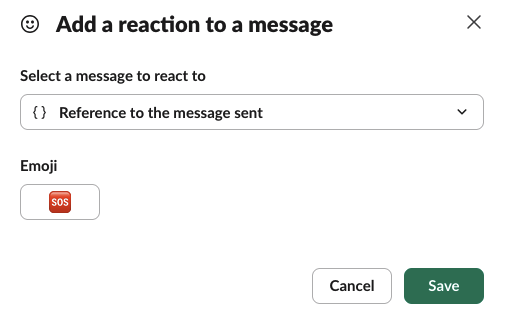
4. Finally, add a step to `Add a reaction to a message` and select `Reference to the message sent` as the message to react to. We suggest using a [Ticket Creation](/tickets/setting-up-your-inbox/ticket-lifecycle/ticket-creation.md#custom-emoji-for-ticket-creation) here so you can ensure your Slack Workflow creates tickets in the inbox you want. Here, we're using the  emoji, but you can choose anything you'd like\
Make sure you've added your emoji as a [Custom Ticket Creation Emoji](/tickets/setting-up-your-inbox/ticket-lifecycle/ticket-creation.md#custom-emoji-for-ticket-creation) in Wrangle as well.\
\
\
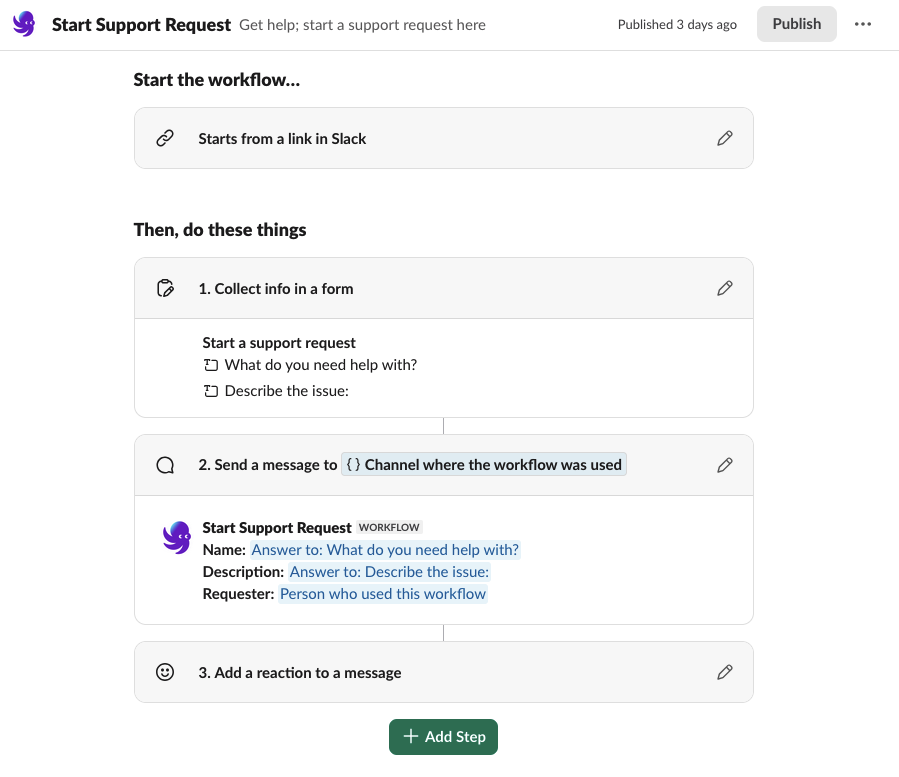
When you're done, your workflow should look like this:\
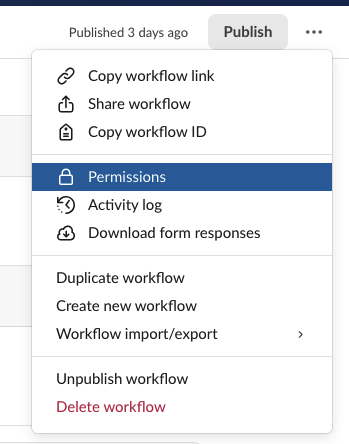
5. You'll also want to adjust the permissions for your workflow to `Also include connected, external organizations to find and run` — you can do this via the Permissions menu in the top right of the Workflow:
That's it! Now you can [feature your workflow in a Slack Connect channel](/integrations/slack-workflow-builder.md#featuring-a-slack-workflow-in-a-channel) to enable your customers to manually create tickets using Wrangle within Slack Workflow Builder.